Shop designs & workshop design ideas

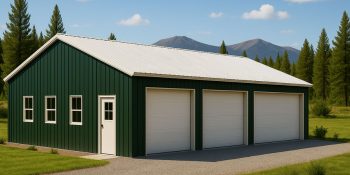
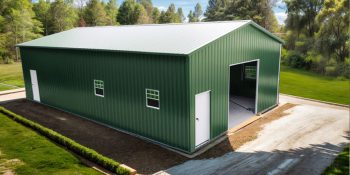
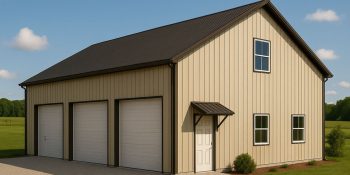
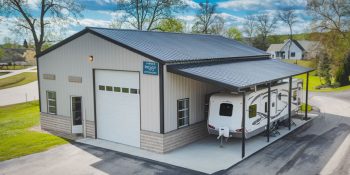
Explore our popular shop designs to help visualize the many customization options available when planning your new workshop building.
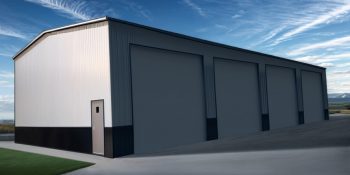
Please note, renderings are for inspiration only. All buildings are designed and engineered to YOUR specifications. For interior finishing, you will need to engage local contractors.
Experiment with the pre-designed shops or start your design from scratch with our intuitive, online 3D designer app
Workshop designs


Get Four Building Estimates
Compare prices from local suppliers and saveSmall shop designs

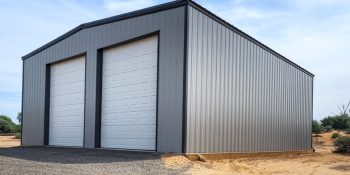

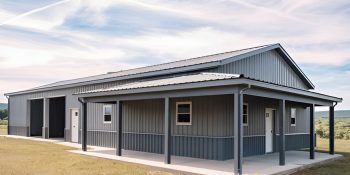
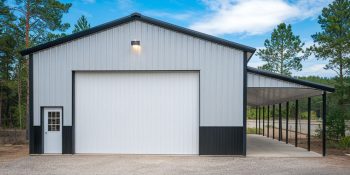
Get Four Building Estimates
Compare prices from local suppliers and saveModern auto repair shop designs
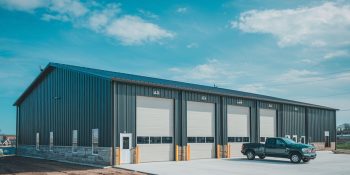


Get Four Building Estimates
Compare prices from local suppliers and saveFAQs
-
What is the process for designing a shop building?
How to design a shop or workshop?
Designing a functional shop or workshop requires careful planning to ensure the space supports your workflow, equipment needs, and long-term goals.
Whether you're building a personal hobby shop or a commercial workshop (like an auto repair, fabrication, or maintenance shop), the design process should prioritize layout, efficiency, comfort, and compliance with local codes.
Here are some key design ideas to consider.
1. Define the Purpose and Usage
Begin by clarifying how the space will be used:
- Personal Hobby Shop: Think woodworking, welding, vehicle restoration, or crafts. These typically require moderate space (20'x30' or 30'x40'), power tools, workbenches, and ample storage.
- Commercial Shop: Examples include auto repair bays, farm equipment maintenance sheds, or light manufacturing facilities. These require larger clear-span areas (30'x50', 40'x60', or 50x100 are common standard size buildings) with 12 to 18 feet tall interior clearances.
2. Plan Size and Layout Based on Workflow
Design around your work process. Divide the space into functional zones:
- Work Area: Central open space for tools, machinery, or vehicles.
- Storage: Wall-mounted racks, shelving, or mezzanines for inventory, parts, and tools.
- Office/Admin Space: Include an office or customer waiting area for commercial shops.
Ensure wide circulation paths, especially for equipment or vehicle access, and maintain at least 3 - 4 feet of clearance around machines or vehicle lifts.
3. Planning Layouts with Floor Planning Apps & 3D Design Tools
Before breaking ground, use floor planning apps and 3D design tools to visualize your layout, optimize space, and avoid costly mistakes.
These tools let you experiment with garage or shop dimensions, equipment placement, door/window locations, and even storage zones, all from your desktop or tablet.
Popular tools like Planner 5D, SketchUp, and RoomSketcher offer drag-and-drop interfaces for drawing walls, placing tools or vehicles, and testing different configurations in both 2D and 3D. Some even allow you to simulate walking through your layout or checking clearances for equipment and vehicles.
Get a visualization of your building with our 3D metal building designer app
Benefits of using design tools:
- Accurately size work zones and tool spacing
- Plan power outlet locations and lighting
- Visualize window and door placements
- Ensure safe traffic flow and clearance for moving parts or vehicles
These tools are invaluable for DIY designers but also useful when collaborating with a builder or supplier.
Tip: Start with a paper sketch, then use a digital tool to refine and finalize your plan.
4. Choose the Right Building Type
Pre-engineered metal buildings (PEMBs) are ideal for shop use. They offer:
- Clear-span interiors (no interior posts) of up to 300 feet.
- Customizable door/window placements.
- Fast, cost-efficient construction.
- Built-in durability and fire resistance.
- Easily engineered for roof-mounted cranes and heavy HVAC systems.
PEMBs are easily customized with overhead doors, lean-tos, insulation, and framed openings for HVAC or ventilation.
5. Design for Utilities and Comfort
Both hobby and commercial shops benefit from smart utility planning:
- Electrical: Install multiple outlets, including 240V for welders or air compressors.
- Lighting: Combine overhead LED lighting with task lights at benches.
- Climate Control: Add insulation, heaters, or mini-split HVAC units for year-round comfort.
- Ventilation: Install exhaust fans, ridge vents, or slider windows, especially critical for welding, painting, or chemical storage.
6. Access and Entry Points
- Garage/Overhead Doors: They must be at least 10’ wide x 10’ high for vehicle access and larger for trucks, tractors, and heavy machinery.
- Personnel Doors: Place near high-traffic areas or offices.
- Windows: Natural light boosts visibility and comfort. Add them high on the sidewalls for security. Translucent skylights should also be considered for additional natural lighting.
7. Special Considerations for Commercial Shops
- Lifts and Equipment: Ensure adequate interior height (14' or more for car lifts), reinforced slab areas, and spacing.
- Drainage and Oil Separation: In-floor drains or oil-water separators may be required for auto shops.
- Code Compliance: Verify zoning, fire protection, ADA requirements, and occupancy codes early in the planning phase.
- Parking and Customer Access: Include a paved lot and signage if clients will visit.
8. Design for Growth and Flexibility
Plan for future expansion with clear access for add-ons. Consider prefab wall panels or modular designs that allow for adding storage bays, a loft, or a wash station later.
If future expansion is a possibility, be sure to specify 'expandable end walls' with your building supplier. This makes it relatively simple to add extra 25-foot or 30-foot bays to your building.
Tip: Many metal building suppliers offer design assistance, 3D models, and stamped engineering plans, perfect for DIY hobbyists and commercial operators who need speed and reliability.
-
Do I need a building permit?
Yes, in most cases, especially within city limits. Some jurisdictions and properties on farmland can be exempt. Be sure to verify the details of your chosen job site.
Some key points to consider:
First, ensure your plans comply with local zoning ordinances, then apply for a building permit. Larger buildings or those with more occupants face stricter regulations.
Submit certified plans. Building officials require third-party certified plans for the structure and foundation, which a reputable manufacturer will provide.
Understand zoning. Determine if your site is zoned commercial or residential and understand specific requirements.
Plan for permit processing. The permit application process can be lengthy. Expect it to take 1-3 months.
Prepare an official site plan. A licensed surveyor or structural engineer should design an official site plan for the permit applications.
Keep building permits on-site. Once you have the necessary permits, keep them ready for any required inspections at the job site.
Adhere to approved plans & designs. Inspectors will reference the certified blueprints throughout construction. If design changes occur, submit new certified plans and apply for new permits to avoid delays and fines.
-
Why must doors and windows be 2' from corners and the roof eave?
Maintaining a 2-foot distance for doors and windows from the corners and the eave of a steel building's roofline ensures structural integrity, safety, compliance with building codes, and practical construction considerations.
Support and stability: corners provide critical support, and keeping framed openings away from corners guarantees stability.
Load distribution: A two-foot distance also ensures even load distribution, preventing structural issues.
Foundation stability: This prevents compromising the foundation and framing during high wind or snow loading.
Ease of construction: Simplifies the installation of doors and windowsInsulation and energy efficiency: The corner and eave areas are critical for the building's thermal envelope. Keeping openings away from these areas allows continuous insulation in these high-heat-loss areas. It also prevents thermal bridging at structural connections, improving the building's overall energy performance.
Weather protection: placing openings away from corners helps prevent water from seeping in and allows for sound flashing installation around openings, reducing exposure to wind-driven rain in vulnerable corner/eave areas.
Clearance for framing: A minimum 2-foot clearance allows room to frame and support the door or window opening correctly. This space is needed to fit wall girts between the corner column and the door/window jamb.
Our manufacturers often recommend adding 8-10 inches to the minimum 2-foot distance for buildings with bypass sidewalls to account for the bypass girt depth.
-
What are my options for installation?
When it comes to erecting your building, you have three options.
Do-it-yourself (DIY). We only advise going this route on smaller buildings (under 2,000 square feet) and if you have previous construction experience.
Self-manage. With a self-managed project, you are responsible for hiring and managing the various sub-trades, including the concrete company for the foundation, the steel erectors to construct the kit, plumbers, electricians, etc.
Hire a General Contractor (GC). For a completely hands-off option, you may want to consider hiring a GC who will manage the entire project on your behalf, from pulling permits and installation to the final inspection. Expect to pay 10-20% for the services of a GC.
-
What is the process for designing & erecting a metal building?
Step-by-Step: Metal Building Design Process
1. Define Building Use & Size- Purpose: Determine if it’s for storage, living, commercial, agricultural, etc.
- Dimensions: Set width, length, and height (e.g., 30x40x10 or 40x60x14).
- Clear Span vs. Multi-Span: Choose based on interior space needs and budget.
2. Site Planning
- Location: Assess site accessibility, grading, and soil conditions.
- Zoning: Confirm land use compliance (residential, agricultural, etc.).
- Setbacks & Easements: Understand local codes for how close you can build to property lines.
3. Design Customization
- Roof Style: Gable, single-slope, or monitor.
- Roof Pitch: Standard is 1:12 to 4:12; steep pitches offer more loft space.
- Doors & Windows: Layout of roll-up doors, walk doors, windows, and skylights.
- Insulation: Choose from vapor-barrier only, fiberglass blankets, or spray foam.
- Interior Layout: Plan for offices, mezzanines, restrooms, or bedrooms and living spaces for residential metal homes & barndominiums.
4. Select Building Materials
- Panel Profiles: Choose ribbed panels (e.g., 36" coverage, ¾" rib height).
- Colors: Select from pre-painted roof/siding color options.
- Trim & Accessories: Gutters, overhangs, wainscoting, and venting.
5. Engineering & Local Building Codes (all handled by your chosen supplier)
- Load Calculations: Snow, wind, and seismic loads per location.
- Building Codes: Ensure compliance with IBC, ASCE, and local codes.
- Stamped Drawings: Required for permitting and inspection.
6. 3D Design & Drafting
- 3D Modeling Tools: Use online tools to visualize the building (e.g., BuildingsGuide 3D Designer).
- Drafting Plans: Floor plans, elevation drawings, and foundation plans.
- Design Revisions: Tweak layout and details before locking in.
7. Submit for Pricing & Permits
- Compare Quotes: Get bids from metal building suppliers or general contractors.
- Permit Application: Submit engineered drawings to your local building department.
- Site Survey: May be required depending on the municipality.
8. Final Engineering & Fabrication
- Final Approval: Sign off on drawings before fabrication.
- Manufacturing: Components are precision-cut, pre-drilled, and delivered as a kit.
Add-Ons & Customization Options
- Mezzanines
- Lean-tos or porches
- Solar-ready roofing
- Interior framing for drywall or partitioned areas
Pro Tips
- Work with an experienced metal building supplier who provides stamped engineering drawings and one who will guide you through the entire design process.
- Use 3D design tools & floor plan apps to test layouts before committing.
- Always verify local permitting requirements before you finalize the building specifications.
Related articles


Why choose us?
BuildingsGuide simplifies the process of finding reputable suppliers of prefab metal buildings, allowing you to select the ideal vendor for your needs and budget.
Since 2004, over 200K buyers have saved an average of 28% on their project with our multiple quote service.
Proudly serving customers in the United States & Canada for over 20 years.
Compare & save!
Let us help you find the best deal on a metal building for sale.
- Tell us about your project
- We match you with vetted suppliers
- You receive four competing quotes
- Select the most suitable supplier
- Start your project
