This page is your step-by-step guide to using our metal building design software. Learn how to create accurate building models, experiment with color options, add doors and windows, and customize every detail.
No technical expertise required!
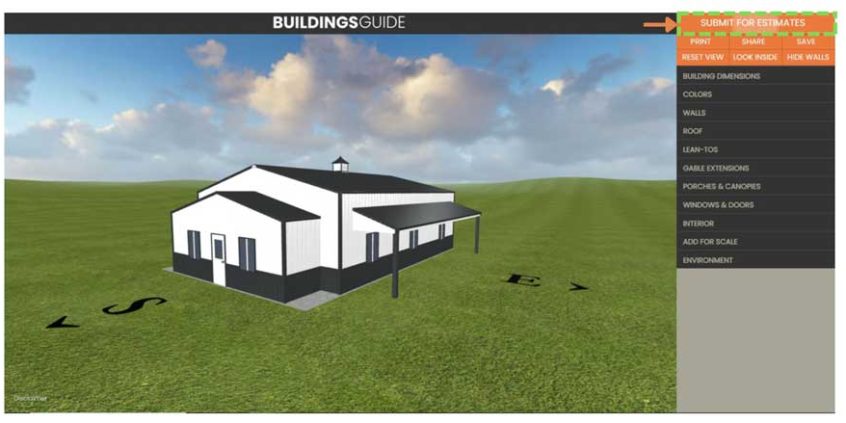
Navigating the Buildingsguide 3D Designer Interface
1. DESIGN AREA:
The Design Area is where you create and modify your 3D model.
Hold the left mouse button to rotate the view, then slide your mouse to the right or left. On mobile, hold your finger on the screen and move the model. To zoom in/out, scroll your mouse up/down, or pinch on mobile.
Right click or three-finger swipe to move the building on the canvas.
2. DIALOG BOX:
This floating box functions to set the position, size, copy, and delete building
component objects. This is where you can adjust the size of doors, windows, and other objects such as porches and canopies. The box can be moved around the screen to make viewing easier.
Pro tip: When adjusting the dimensions of several windows, position the box to the right of the bank of windows, then select each window in turn and adjust the dimensions. This way, you don’t need to keep opening the dialog box.
3. MENU BAR:
In this section, you can perform any of the following tasks:
- Print - send the design to your printer
- Share - send a link to your design to a friend or colleague
- Save - send a link to your design to yourself
- Reset view - reposition the building to its original position
- Look inside - view the interior of the building
- Hide walls - this button toggles on/off the following: wall panels, roof panels, and roof girts. This option is helpful if you want to view objects placed inside the structure.
4. TOOLS BAR:
The Toolbar is the default toolbar and contains all the basic building components needed to create and modify 3D models. These can be opened and closed to save screen space.

Getting Started

1. Building Dimensions
You can adjust the building dimensions (in feet) by selecting the BUILDING DIMENSIONS menu option.

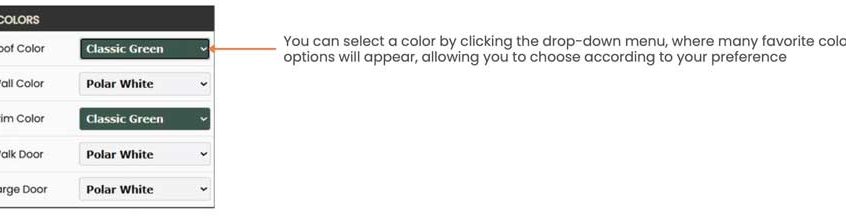
2. Adjusting wall and roofing colors
By default, the roof color is Classic Green, and the wall color is Polar White. You can change these according to your preference by selecting the COLORS menu option.
Adding Lean Tos
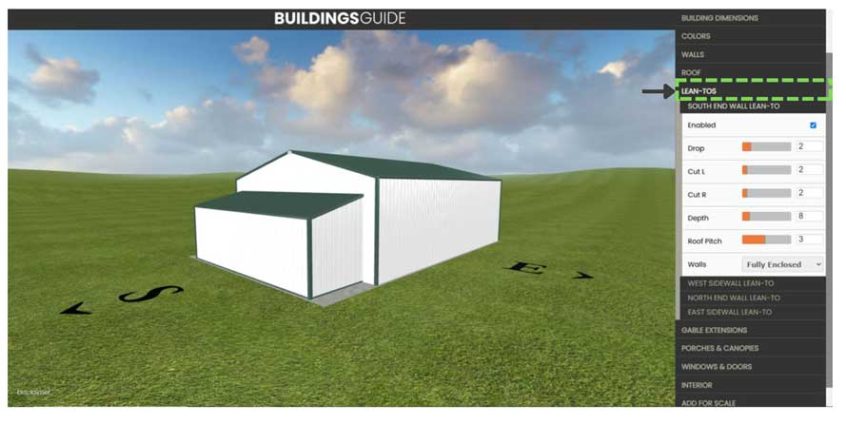
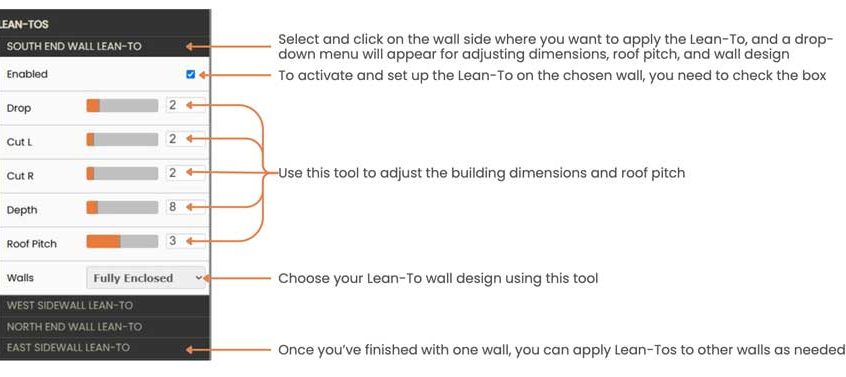
Add Lean-Tos by clicking the LEAN-TOS Menu option. A drop-down menu will appear, showing the building walls' four sides (N, S, E & W). Select the side where you want to add the Lean-To, and another drop-down menu will appear to configure its settings.
Adding a Canopy
A canopy is a building component, just like a Lean-To. You can add it to the structure you are designing. However, when applying it, the canopy tool has a different setup method than a Lean-To.
1. The PORCHES & CANOPIES menu allows you to add a door canopy to your design.
2. The canopy options are located in the bottom drop-down menu. Click on it, and a dialog box will appear in the design area (see screenshot below).
3. Use the dialog box to move the canopy to the desired location and adjust its dimensions. Once you’ve finished making the settings, click " update" to close the dialog box.

Adding Roof Overhangs
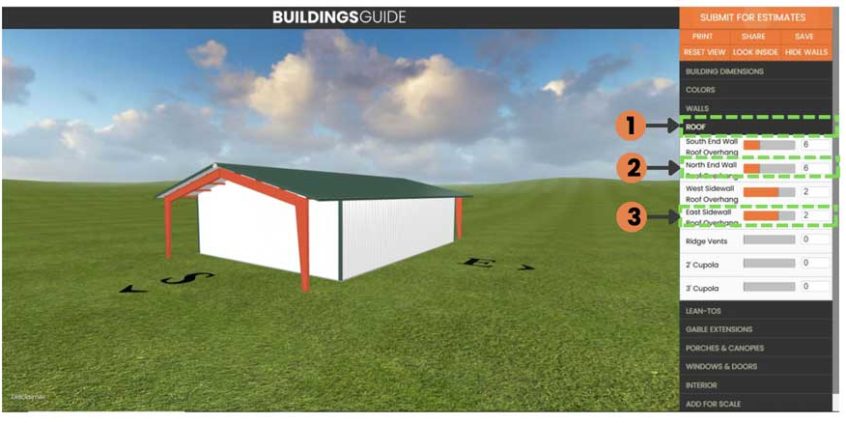
1. Use the ROOF menu option to add overhangs to your roof design. Overhangs can be used on all four sides of the building.
2. On the north and south ends of the building, you can set the overhang length between 1 and 20 feet. If the overhang extends beyond 3 feet, additional steel columns and beams will automatically be added to the roof overhang design.
3. However, the maximum overhang length on the east and west sides of the building is limited to 3 feet.
Adding Gable Extensions
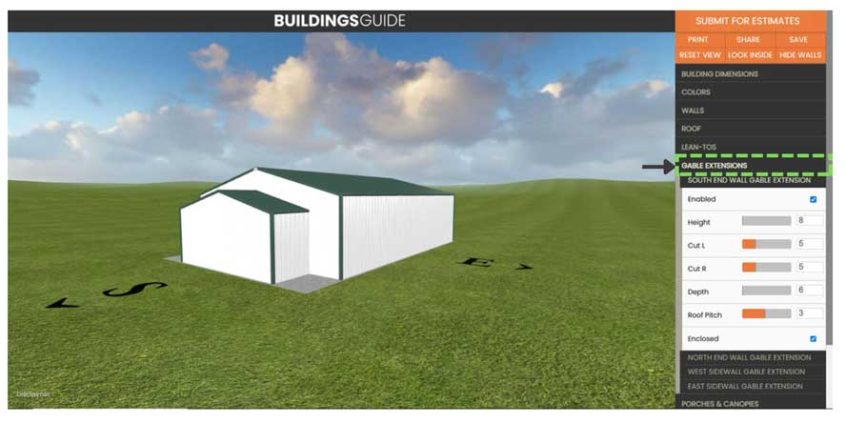
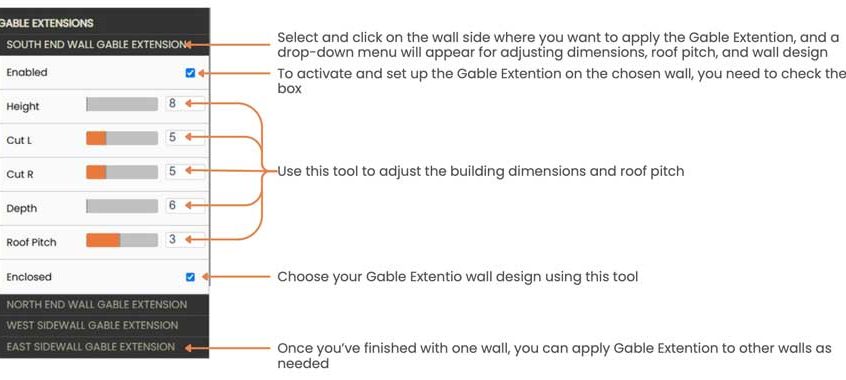
The process for adding gable extensions to your design is the same as adding Lean-Tos. A drop-down menu will appear, showing the four sides of the building walls. Select the side where you want to add the Gable Extension, and another drop-down menu will appear to configure its settings.
Adding Porches
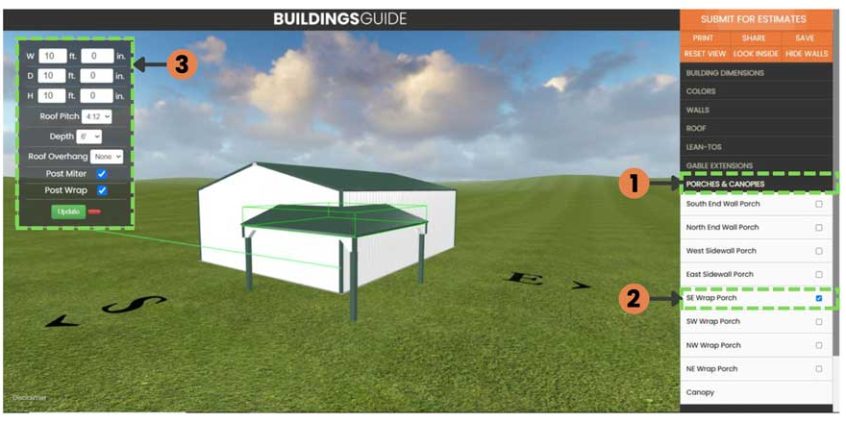
1. Click the PORCHES & CANOPIES menu to add an Entrance Porch to your design.
2. A drop-down menu will appear with options for the wall side where you want to apply the porch.
3. A dialog box will appear to allow you to adjust the porch's Dimensions, Roof Pitch, Overhang, and Columns. Once you've finished making adjustments, click "update " to close the dialog box.

Adding a Wrap-Around Porch
1. Click the PORCHES & CANOPIES menu to add a Wrap-Around Porch to your design.
2. A drop-down menu will appear with options for the building corners where you want to apply the porch. Check the dialog box to choose a location for the porch.
3. A dialog box will appear to adjust the Dimensions, Roof Pitch, Overhang, and
Columns for the porch you are applying to. Once you've finished making the settings, click "update" to close the dialog box.
Adding Windows & doors
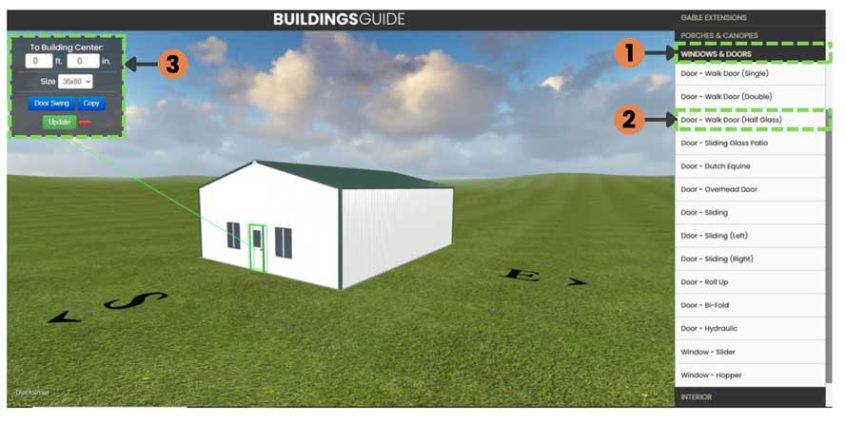
1. Doors and windows are essential components in any building. In the BuildingsGuide 3D Designer, we offer a selection of popular window and door types and sizes, which you can choose by clicking WINDOWS & DOORS in the menu.
2. Based on your needs and preferences, select your preferred door and window design from the appropriate drop-down menu.
3. To adjust dimensions and placement, use the dialog box. Don’t forget to click
"Update" once you’ve configured your settings to close the dialog box.
Adding Ridge Vents & Cupolas
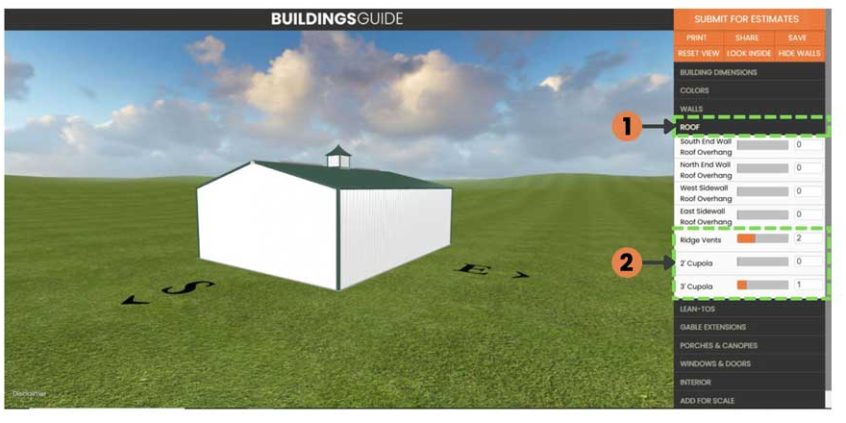
1. Select the ROOF menu option to add Ridge Vents and Cupolas to your roof design.
2. In the drop-down menu, you will find separate options for Ridge Vents and Cupolas. You can add them by either sliding the available slider bar or typing in the desired number of Ridge Vents or Cupolas according to your needs.
Adding Wainscot
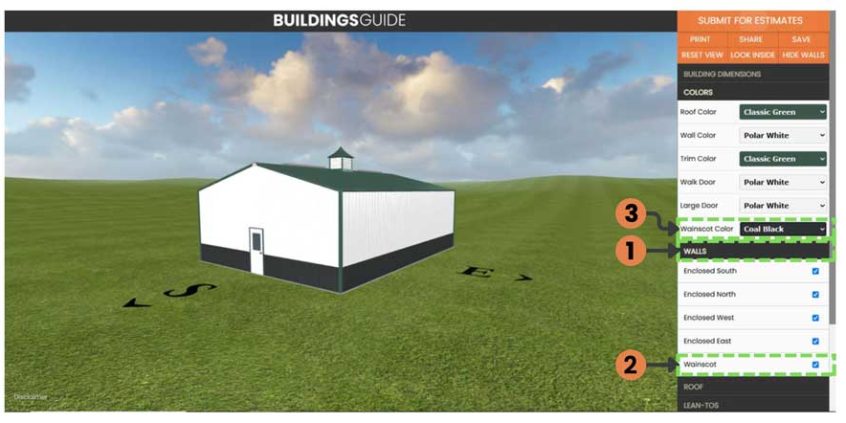
1. To add Wainscot to your wall design, you can find it in the WALL menu option.
2. The Wainscot option is at the bottom of the drop-down menu. You can apply it to your design by checking the available small box
3. You can change the Wainscot color according to your preference via the COLORS menu option.
Save & Share Your Finished Building Design
If you’re satisfied with your building design, you can save and/or share it. Your saved design will be emailed to you or anyone you choose.
If you’d like to revise or further develop the building design, reopen the design using the link provided in the email.

Getting Building Estimates
Now that you have a close representation of your new building, it's time to get price estimates.
Start by selecting the SUBMIT FOR ESTIMATES option at the top of the menu.
Add your contact details, and we will match you with up to four leading metal building suppliers who will provide written estimates within 24 hours.
We hope you enjoy using our 3D designer, and good luck with your building project.
Get in touch if you need further assistance.